7

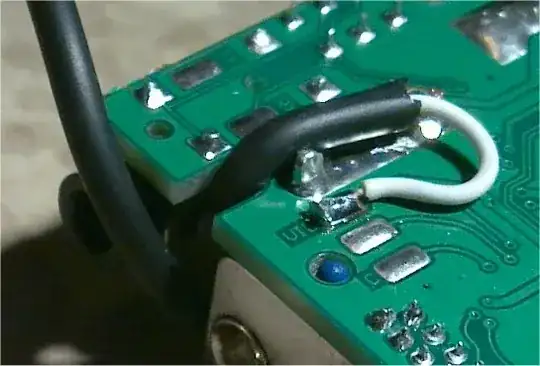
After a simple flashy-LED kit's worth of practice, through-hole soldering is fairly straightforward. What I'm still having trouble with is wire-to-pad and wire-to-wire soldering.

The first problem is keeing stuff still. Blu-tac helps but gets melty, and I've never used a "third hand" that was worth a damn. Is it worth paying more for a better one? Any other tips?

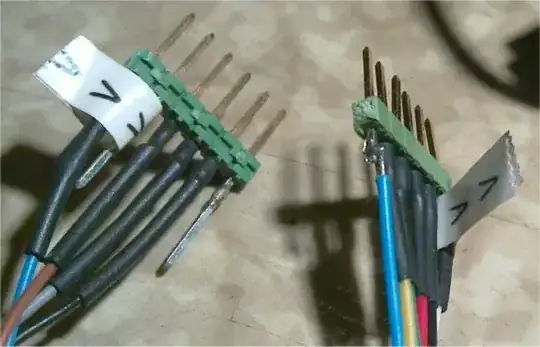
My particular application is soldering 0.1" SIL sockets to flat flex cable (me again!). Would solder paste and the heat gun attachment on my butane iron work well?

Robert Atkins
  • 2,155
  • 3
  • 23
  • 37

2 Answers2

11

Wire to SIL socket:

  • Put the socket on a bench vice to hold it still.
  • Heat up the pin with your soldering iron, then apply a bit of solder. Don't heat too much or you'll melt the plastic spacer between the sockets. Repeat for all pins.
  • Strip wire ends. If using multithreaded wire, it might be a good idea to pre-solder the wire ends too.
  • Now, holding the iron in one hand and the wire in the other, heat up the pin and touch the wire end on the iron. Once the solder melts, move the wire end into the molten solder, then move the soldering iron away. Hold the wire still until the solder solidifies. A stable posture will help.
  • Inspect. If it looks like a cold joint (matte grey, brittle), add a bit of fresh solder and redo the joint applying afterheat a bit longer.
  • Put a 2-3 cm. piece of <3mm heat shrink tube over the joint, pin and wire. Shrink it tight to make it more durable.

Wires soldered to pins

Wire to pad:

  • Basically the same thing - apply enough pre-solder on the pad to immerse the wire end.

Wires soldered to pad

General advice:

  • The thicker the wire / the larger the foil you're soldering, the longer pre-heating is required on that surface.
  • If the metal you're trying to solder is in contact with eg. metal pliers or bench vice, the tool will conduct lots of heat away making your work difficult.
makes
  • 565
  • 6
  • 14
  • 1
    Aha, pre-tinning both the SIL socket's pin and the pad could be the secret. I'll try it and report back. – Robert Atkins Jan 17 '11 at 23:42
  • I'm assuming the above advice applies to SIL-socket-to-pad, also? – Robert Atkins Jan 17 '11 at 23:44
  • Indeed it does. If you have a longer strip of sockets to solder on adjacent pads, you'll only want pre-solder one pad. Once the part is attached to the PCB with a single joint, it will stay in place - you then feed fresh solder with the freed-up hand, just like soldering through-hole mounts. – makes Jan 17 '11 at 23:59
  • Well, despite the good advice, I still managed to f%#k it up spectacularly: http://frabjousdei.net/post/2871704888/i-cant-solder-to-save-my-life-ive-just-proven – Robert Atkins Jan 22 '11 at 10:37
4

You need to tin the wires and pins (I usually tin both, especially if using stranded wire) before bringing them together. Put one in a third hand/vice/under a heavy object, making sure that the grip is far enough away to avoid melting the insulation. Flux both ends, because the flux which was in the solder before tinning the wires has been activated and is no longer useful. Then, hold the one wire in one hand and your soldering iron in another, and bring the two together.

Always include some heat shrink or other strain relief (I like hot glue) for any of these joints.

Kevin Vermeer
  • 19,989
  • 8
  • 57
  • 102
  • Actually, I was planning on using E6000 under the heatshrink, as it says, "hot-melt glue does exactly that": http://wiki.orbswarm.com/index.php?title=Building_Electronics_and_Robots_for_the_Desert – Robert Atkins Jan 18 '11 at 00:09
  • @Robert - Good point! I've also used superglue for really small stuff, but a limited flexibility epoxy like E6000 is probably better for larger wires like you're working with. – Kevin Vermeer Jan 18 '11 at 00:32