7

After having modified my code in Atmel Studio 6, I write the program to my MCU in the following steps:

  • Click Build or F7
  • Click Device Programming or Ctrl+Shift+P
  • Click Apply (to choose programmer+device+protocol)
  • Click Memory
  • Click Program

How can I do all of the above in one step in Atmel Studio 6?

Andreas
  • 713
  • 2
  • 13
  • 21

3 Answers3

8

Wow, you're certainly rebuilding your project the hard way.

enter image description here

There is a single click (or keystroke) solution to rebuilding any changed files, and programming the mcu with the new binary. You're looking for the "run" command, which is F5 in a default install. You can also access it from the debug menu, you want the "continue" command (no, I don't know why it's named that).

enter image description here

You can also hit the green "play arrow" (in the blue box) on The toolbar to rebuild and launch with the debugger attached. It's the shortcut to the run command. The Non-filled "play" arrow (in the red box) will rebuild and launch your project without the debugger attached.

Re: Tooltips - The Green arrow's tooltip is Start Debugging. It should probably really be
Start *with* debugger. The Green arrow outline's tooltip is Start without debugging, which is more clear.
I suspect a lot of this is behaviour inherited from Visual Studio, which Atmel Studio is built on. If you're familiar with one, the other becomes a lot more predictable.

Connor Wolf
  • 31,938
  • 6
  • 77
  • 137
user25888
  • 96
  • 1
  • Wow. The tooltip is something like "start debugger", so I didn't even try. – Andreas Jul 01 '13 at 14:20
  • 1
    @Andreas - It does start the debugger. It just has to rebuild the project first, so you're debugging the code you're looking at in the IDE. Otherwise, it would be trying to debug whatever binary is on the MCU, not the code you're editing. – Connor Wolf Jul 01 '13 at 15:52
  • Oh, for anyone curious, I am also user25888. I just originally answered the question from my phone, which wasn't logged on (that's what happens when I'm standing in line at costco, I guess). – Connor Wolf Jul 01 '13 at 15:52
  • 1
    That must have been some line. :) I think you can ask moderators to merge the accounts, if you're interested in doing so. – JYelton Jul 01 '13 at 16:55
3

How you program the MCU is tied to the programmer you're using. For example, because Atmel Studio doesn't natively support the USB Tiny, the process is different.

If you happen to be programming AVR microcontrollers with the USB Tiny, there's a video explaining how to set up External Tools in Atmel Studio, making use of avrdude.

Here's the summary of how to set it up:

  1. Go to the Tools menu and select External Tools...
  2. Give the default [New Tool 1] a Title, for example, USBTinyISP
  3. The Command is avrdude.com
  4. Arguments are the parameters passed to avrdude. Here you can insert placeholders for project filenames. The example in the video is:

    -c usbtiny -p m324p -U flash:w:$(ProjectDir)Release\$(ItemFileName).hex:i

    Change m324p to the appropriate MCU. (You might want to make multiple External Tools if you work with multiple types, otherwise you need to change this as you change MCU's.)

    $(ProjectDir) and $(ItemFileName) are variables which you can insert by clicking the arrow just after the arguments field.

    Finally, be sure to include :i at the end of the string, this indicates Intel Hex format.
  5. Leave Initial Directory blank (ref).
  6. Check Use Output window

When you've selected Release in Atmel Studio, building the project will build files in the bin\Release subfolder in your project directory. (You can create a separate external tool for Debug if desired; the video shows this as well.) Selecting the External Tool will then use the output files per avrdude command line and write to the MCU.

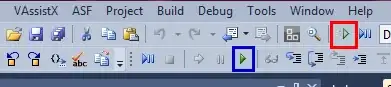
If you want, right-click a menu bar and select Customize if you'd like to add a button for the External Tool, rather than selecting it from the Tools menu each time.

With this process, you can build the project (F7) then write to the microcontroller with a button click.

JYelton
  • 32,302
  • 33
  • 134
  • 249
  • Thanks. I'm using Olimex AVR-ISP-MK2, which emulates Atmel AVR ISP MkII, which is supported by Atmel Studio. – Andreas Jul 01 '13 at 17:55
  • No problem; I added my answer for anyone using the USB Tiny (like myself). The video sort of takes a while to correct the data in the External Tools dialog, so I wanted to create a short summary anyway. This seemed like an appropriate place to have this information. – JYelton Jul 01 '13 at 17:59
  • These days you're better off using `-U flash:w:$(TargetDir)$(TargetName).hex:i` It works for any build configuration (Release / Build) and points to the correct file (ItemFileName didn't, for me). Keep the `-c` and `-p` switches as above (changing the latter to whatever your MCU is). – rkagerer Jun 11 '18 at 09:02
1

Get yourself a keyboard macro program such as MacroExpress from http://macros.com. This very nice program can automate almost any tedious and repetitive keyboard and mouse sequence. The sophisticated scripting language included in the product can allow you to condition and qualify the sequence being automated based on time delays, menu contexts, or window presence.

Michael Karas
  • 56,889
  • 3
  • 70
  • 138