1

We have a set of 4 control signals at 3.3V. For each of these control signals, we want to generate a pair of output signals. For example, if \$control_1\$ is high, then \$out_1\$ is 24V and \$out_1inv\$ is 0V. We do have a 24V rail to work with. So far we've accomplished this with a set of 4 DPDT relays. I was looking to see if there was a "better" way. When I say "better" I mean smaller, more power efficient, more reliable, and less expensive. I've been reading about push/pull and totem pole drivers, but I'm wondering if there is something simpler to generate the complementary outputs in the same small sub-circuit, rather than 2 separate push/pull circuits per control input.

EDIT: I should note that each of the 24V outputs (inverting and non-inverting) need to drive an optocoupler when high that has an input impedance of 4.7kOhms

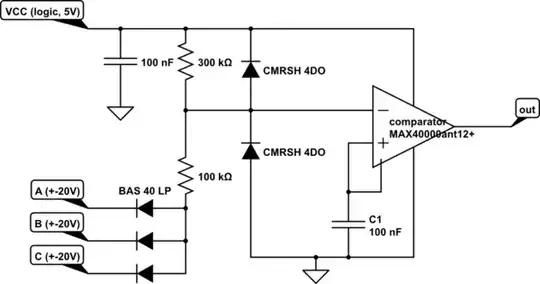
EDIT 2: Here is the diagram showing the optocoupler load. enter image description here

EDIT 3: There are 8 individual optocouplers to drive. 4 should be driven at any given time. All of the 0V connections to the optocouplers are connected to the system ground inside of the device. So I don't think low side switching is going to work for this application.

matth
  • 117
  • 7
  • I'm just a little confused. Do you have eight opto-couplers being driven? One for out1, another for out1inv, another for out2, etc? Or are you using out1 and out1inv, both, to go to the same opto-coupler, so that it is on when control1 is on and otherwise off, so there are only four optos? I think I do understand the use of the DPDT relays. I'm just not sure of this situational aspect from your wording. – jonk Aug 21 '21 at 06:36
  • @jonk there are 8 optocouplers. All part of an external device with which I'm trying to interface – matth Aug 22 '21 at 00:37

4 Answers4

3

The IRF9530 is overkill but you can substitute for whatever you might have on hand. This assumes you're just driving an optocoupler with the non-inverted output and only drawing a few mA (unsure what "24V output" you were referring to).

schematic

simulate this circuit – Schematic created using CircuitLab

enter image description here

vir
  • 14,718
  • 13
  • 28
  • I think the load of the optocoupler is about 5mA. I'd also like to drive an LED indicator. So conservatively, let's call it 10mA total. We will also be driving a separate optocoupler/indicator with the inverted input. So could this work just as well with 50 Ohm resistors instead of 5k? – matth Aug 20 '21 at 16:47
  • Each LED indicator can be in series with its optocoupler's input LED. This gets double duty out of the activating current, and as a bonus indicates an open circuit/failed/opto. – AnalogKid Aug 20 '21 at 17:21
  • You'd need to use 3+ watt resistors with 50 ohms. You could probably use the optocoupler/LED indicator series combination as @AnalogKid suggested in parallel with M1 and adjust R1/R3 accordingly to make sure M2's gate voltage stays within reasonable limits. – vir Aug 20 '21 at 17:42
  • Right, I didn't think of the huge wattage for those resistors. Since that's unpalatable, I guess I don't see a great way to use an N-channel FET for either of the outputs. I guess we could use a pair of P-channel FETs and drive one gate from the drain of the other somehow? – matth Aug 20 '21 at 18:08
  • Just stick the opto in parallel with M1 so that when M1 turns on, all the current goes through it instead of the opto. – vir Aug 20 '21 at 19:01
  • @AnalogKid - Not gonna work with a 3.3 volt input signal. Or at least it will require careful component selection. – WhatRoughBeast Aug 21 '21 at 03:24
  • Depends on where the optoisolators are connected. I expand on this in my answer. – AnalogKid Aug 21 '21 at 03:29
  • @AnalogKid - Oops. I inadvertantly had the OP's schematic in mind when I commented, and that circuit has likely problems with diode drops being greater than 3.3 volts. Your expanded answer makes it clear that I got you wrong. My apologies. – WhatRoughBeast Aug 21 '21 at 04:48
2

I interpreted your question to mean that you wish to control the opto-coupler LED (input) side from a 3.3V signal source.

The circuit below will take a single 3.3V signal, and switch one opto-coupler on and the other off, or vice versa, depending on the input signal level:

schematic

simulate this circuit – Schematic created using CircuitLab

If the input signal changes like this:

enter image description here

then current in the opto-coupler LEDs will look like this:

enter image description here

This relies on the fact that Q1's drain is either 0V (left opto-coupler is "on", passing LED current) or 24V (left opto-coupler is "off"), and Q2 can invert that voltage to provide the converse state in the right opto-coupler.

Take care to use a MOSFET that can handle 24V long-term at its gate. I chose the VN0606 for precisely that reason.

High-side switching version

In response to the new information regarding the need for high-side switching, here's a version using P-channel FETs instead:

schematic

simulate this circuit

The only other change is the level translator formed by Q3 & R1. It's needed because Q1's gate must be near 24V for it to switch off, which cannot be achieved with a 3.3V input signal.

Using jelly-bean MOSFETs

If the MOSFETs have a maximum gate-source voltage of less than 24V, we need to protect them. For Q1's gate, this is easy, but Q2 requires some extra care:

schematic

simulate this circuit

We use a simple potential divider (R1 and R2) to raise the lowest voltage ever applied to Q1's gate from 0V to +12V.

We can't use this trick directly for Q2's gate, because a similar potential divider connected between Q1's drain and +24V would create a permanent current through the left opto-coupler.

Therefore Q4 is employed as a buffer for the drain voltage of Q1. It's a source follower, presenting no load to Q1, and its source voltage is always slightly above Q1's drain. We are free to load that voltage source with another potential divider (R3 and R4) to constrain the voltage seen by Q2's gate.

Simon Fitch
  • 27,759
  • 2
  • 16
  • 87
  • Re-reading the question again, I think this circuit is the way to go. The opto input current is 5.1 mA. If you add a visible LED in series with each one, that drops to 4.7 mA. That should be OK, but without more information about the opto part number and the circuit it drives, we cannot know for sure. – AnalogKid Aug 21 '21 at 12:46
  • I didn't read the comment about the LED indicators until just now. I doubt their presence in series would upset anything. Could always put them in parallel with the opto-coupler input, outside that path. – Simon Fitch Aug 21 '21 at 12:58
  • This is incredibly straight forward. Choosing a MOSFET that can take 24V at the gate is a great plan and makes it even simpler. I just made an edit to the post to clarify that the 0V connections for all 8 optocouplers are connected to the whole system ground, so I don't think we can use low side switching like this. But I can see this working with P channel FETS in a similar manner. – matth Aug 22 '21 at 01:06
  • Sure you can use P-channel FETs. You will then also need a translator to get from 0V & 3.3V to 0V & 24V. – Simon Fitch Aug 22 '21 at 02:15
  • I updated my answer to include a version which switches on the high side. – Simon Fitch Aug 22 '21 at 02:43
  • And it looks like we could add 3 resistors for voltage dividers at the gate of each p get so we could use parts with a lower Vgs rating. – matth Aug 23 '21 at 19:05
  • @matth: A single 10k at Q3's drain will work well to limit the potential at Q1's gate, but it's not so simple for Q2. If you place a divider between Q1's drain and +24V, you are creating a permanent current through Q1's opto-coupler, even if Q1 is off. – Simon Fitch Aug 23 '21 at 22:33
  • If the Q2 gate divider has a sufficiently high resistance, like a pair of 47k, would that limit the current enough to assure the opto isn't activated? Or since we don't have the details on those parts, do you not feel confident in that? – matth Aug 24 '21 at 00:17
  • @matth: I am not confident that the opto-coupler will remain inactive at low currents. You'll have to experiment to find out what LED current switches them on, and stay *well* below that. A better solution would be a fourth transistor (source follower, for example) to buffer Q1's drain voltage. Would you like me to add this to my answer? – Simon Fitch Aug 24 '21 at 01:11
  • I think I'm understanding. Would this new 4th transistors gate be connected to the gate of Q1, and used only to drive the gate of Q2? – matth Aug 24 '21 at 02:15
  • @matth OK, I'll update the answer, to illustrate. – Simon Fitch Aug 24 '21 at 02:25
  • Brilliant, thank you. You're insights have been very helpful, and are making me realize how green I am with this. – matth Aug 24 '21 at 12:25
1

The way I read the question, there should be two optocouplers to provide complimentary outputs. I would adjust the vir schematic thus:

24 V minus 3.5 V (1 IR and 1 regular LED in series) = 20.5 V

This times 10 mA = 0.205 W, the total power dissipated in each resistor string when that string is on.

One (opto + indicator) in series with R3 and the other in series with R2.

Adjust R2 = 2K; R1, R3 = 1K each. If your optocoupler Vf is greater than 1.5 V @ 10 mA, adjust the resistors accordingly

Separate from that, there is another way to do this that eliminates M2, R2, and R3 (but adds a small signal diode). The parts are from my design library; substitute as necessary.

UPDATE: Added visible LED indicators to the two optos.

enter image description here

AnalogKid
  • 16,865
  • 1
  • 13
  • 25
  • I love the minimal part count here. I just made an edit to the post to clarify that the 0V connections for all 8 optocouplers are connected to the whole system ground, so I don't think we can use low side switching like this. But I can see this working with a P channel FET in a similar manner. Also, there is already a resistor in series with the optocoupler in the device we're interfacing with. – matth Aug 22 '21 at 01:09
  • I see that about the resistor, which is why this circuit will *not* work for you. The shared resistor (R1) and unshared diode (D3) combine to make the circuit work. This is why I recommend Simon's circuit(s). – AnalogKid Aug 22 '21 at 03:14
0

Using comparators

Since the circuit in my previous answer has become quite complex, I had the idea of using comparators to the same end:

schematic

simulate this circuit – Schematic created using CircuitLab

The most difficult part of this approach is keeping the comparator inputs within their acceptable common mode range. I achieve this by biasing the input signal to become either 1V or 3V, with R5, R1 and R2. This signal is compared with the fixed 2.2V derived from R3 and R4.

Note how the two comparators have their inverting and non-inverting inputs swapped (with respect to each other), so that one has a high output while the other is low.

Simon Fitch
  • 27,759
  • 2
  • 16
  • 87