4

I am wanting to place a 3mm LED and carbon resistor, outside between two paving stones. There is about a 4mm gap between pavers where the parts will be. The top of the Led will be flush with the top of the pavers and there will be wires running under the paving stones to remotely power it. There will be one led every 40cm for around 6m, where they are being used to provide a diffuse glow to underlight a rock wall. No room to place a more traditional sealed unit.

How can I protect the Led leads and resistor from moisture? Will heat shrink be sufficient or is there something better to encase it in? I know this will not be a perfect solution but I am hoping to provide something that can survive a few years. With it being set in concrete, I only get one chance to get it right.

Once the led/resistor are placed between the pavers, locking sand will be poured around them, which sets like concrete after being wet once. Only the top of the led lens will be visible. Problem I see is that moisture will still seep through somewhere.
rlb
  • 143
  • 4
  • 2
    Just a thought, but would an optic fiber be sufficient? This is just a single LED right? – jonk Oct 24 '16 at 01:47
  • If its that permanent you might consider burying a couple of whatever you end up building. So if one fails you can use the other. Also might want to look at some resins/epoxies. – Wesley Lee Oct 24 '16 at 01:59
  • @jonk there are about 15 in total to provide glow under rock wall. Have updated q. Will investigate f/o as alternative. – rlb Oct 24 '16 at 02:49
  • Can you consider several LED's instead or I can send you some great 16kmcd 5mm parts? 3mm is so puny. I would use PU adhesive from a caulking gun and protect the lens from smear (any way that works) and use liberal amounts in the gap with a backing to prevent it from oozing out until cured. Full Hardness takes a few days . – Tony Stewart EE75 Oct 24 '16 at 02:50
  • 3
    Moisture is not the only problem. Since there is so little space to place the LED with no additional protective enclosure, also mechanical stress becomes an issue. Material expansion during day/night or seasons may crack the tiny LED case. – LorenzoDonati4Ukraine-OnStrike Oct 24 '16 at 03:01
  • 1
    It sounds as though this is new construction and not a retrofit to something already there. So can you consider including a Schluter strip? I'm thinking you might drill holes in it for the LEDs, set and place and then harden the wiring behind permanent waterproof epoxy and let that harden. All the LEDs, leads, resistors, and some of your wiring gets embedded that way. The rest is just a narrow "straw" filled with the wires and epoxy. Once all that sets, nothing will get it and you can set your tiles over it. – jonk Oct 24 '16 at 03:18
  • Moisture is a b@$t@rd. It *willl* get past normal heatshrink in a heartbeat (ok - maybe it'll last a week if you're lucky - longer if you never see any rain). "Glueshrink" might last a little longer - but the "glue" is just simple hot-melt so it's not likely to bond to the body of the LED or the wire insulation. If you *really* want it to last then I'd suggest encapsulating the entire setup in an epoxy (choose one which properly bonds to whatever insulation is on your wires. – brhans Oct 24 '16 at 12:19
  • FYI heat damage from exceeding solder time to leads will damage epoxy seal and increase moisture absorption rate inside. So proper fast soldering 3seconds >5mm from base and rear moisture seal is important for epoxy encapsulated 3 or 5mm LEDS. You should also be advised to use ESD protected LEDs or use critical handling. My clients failed these two steps and had high failure rates in the field, until I corrected these two issues. (FYI only) If you need ESR protected 5mm LEDs I have tons of leftover stock. – Tony Stewart EE75 Oct 24 '16 at 14:18

1 Answers1

1

The heatSHRINK tubing idea is not so bad except for the rear lead exposure which you can pre-coat with adhesive ( Epoxy or PU or silicone )

I think the heatshrink will give a buffer to shrinkage of concrete for stresses on gold whisker wirebond but also might make it easy to poke thru the morter unless flush YOu can always cut excess heatshrink after while protecting the lens in the process. But it does reduce the aperture cone angle significantly if beyond the curvature of the lens.

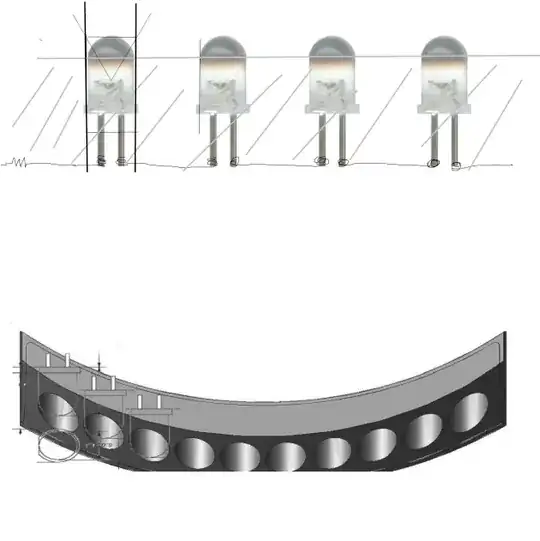
Just some other ideas... enter image description here

Any kind of form will improve alignment.

Any kind of facial diffusion would make a bright brick more pleasing.

More ideas

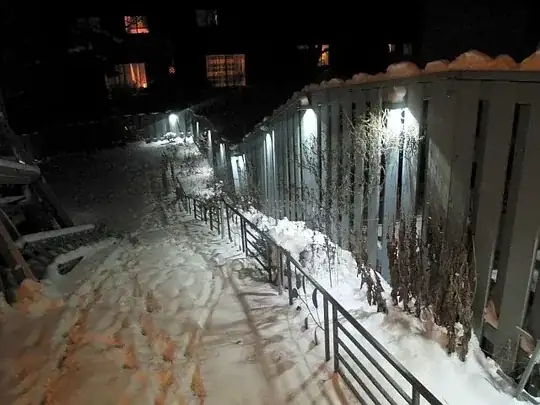
enter image description here enter image description here enter image description here enter image description here My garden LEDs were just 4x1W on 4"x1" Al-clad, PCB powered by unregulated 14V with long 2V drop from AWG18 wire resistance and all 4S LEDs in parallel, shown above using a Schlumberger 200W external transformer formerly used to power external 12Vac 8W Halogen lamps. I modified it with bridge and cap. and covered hidden LEDs to prevent glare with cedar wood stained like the fence.

Tony Stewart EE75
  • 1
  • 3
  • 54
  • 182
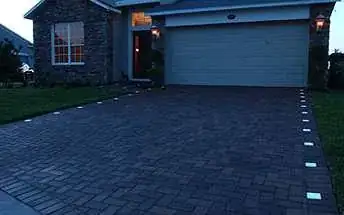
  • Thanks. The steps in pic 4 is my situation except it is lighting a rock wall form ground level upwards. Am trying some of suggestions to see which is workable for me. – rlb Oct 27 '16 at 04:39
  • You will need a few watts at least to be useful, otherwise just ornaments with glare. Consider down cast to avoid rain like pic 3 – Tony Stewart EE75 Oct 27 '16 at 04:53