1

I am looking for a (simple) circuit to monitor between 1 and 16 independent 18 VAC power sources, all sharing a common ground.

While some might be OFF and some might be ON, the monitoring is about detecting the transition OFF->ON of any of those 18 VAC power sources.

When an OFF->ON detection occurs, I need to close ONE small single contact relay for ~8 seconds.

I do not need simultaneous detection capability; i.e. I do not need the detection to continue working during the ~8 seconds already triggered by one detected OFF->ON event. The monitoring just restarts after.

Your help will be really appreciated.

Daniel

Just for reference, here is one post that is related to my question, but not exactly covering my need: AC detection for microcontroller

  • What frequency is the AC, and when the AC goes OFF, will that AC source float or will it be connected to ground? – EM Fields Mar 07 '16 at 04:08
  • @EMFields: AC is 60HZ,18VAC, and when the AC goes OFF, it will be because it is disconnected by an interrupter or a relay. On the other side, the loads will remain connected on the lines (lights, relay coils, etc..), so it will be pulled-down to ground by the loads. – Daniel Auger Mar 08 '16 at 01:40
  • Would you consider the use of a micro-PLC or do you particularly want to build something? For a one-off application the PLC will prove very reliable, long term support and easy to program. – Transistor Mar 09 '16 at 14:59
  • @transistor: Thanks for suggesting the micro-PLC approach, but as I am looking for a simple [read "cheap"] circuit, I do not think that I could consider this option for now. This is based on the little I read/know about it (ex: velocio.net), but I might be wrong. Examples or recommendations are welcome. – Daniel Auger Mar 10 '16 at 00:53

2 Answers2

1

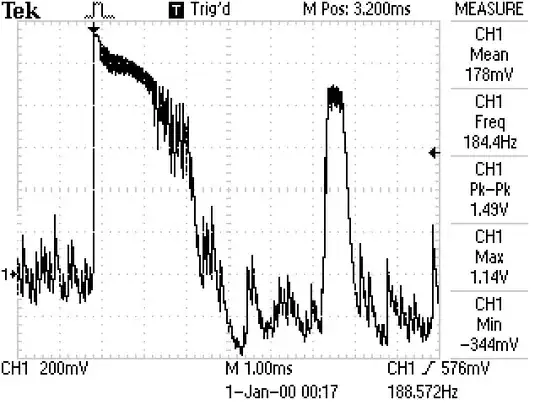
This should work for you; an AC OFF-ON transition detector, an 8 second timer, and a relay driver, all out of one 555 and a few discretes per channel.

Note that if the relay is off and one channel goes hot, the relay will make and then break 8 seconds later. However, if a second channel goes hot while the relay is made, it'll stay made until that channel's timer times out.

Note also that if a timeout is in progress and power fails on that channel, for any reason, timeout will be aborted and that channel's output will go Hi-Z.

enter image description here

UPDATE/REDESIGN

The Zener voltage dropper was a mistake; here's a much cleaner, better way to do it for just about the same price,

enter image description here

and an LTspice circuit list follows just in case you want to play around with the circuit.

Note that some of the components are different from the schematic shown above, but the functionality is the same.

Version 4
SHEET 1 1108 1140
WIRE -1856 320 -2000 320
WIRE -1696 320 -1776 320
WIRE -1584 320 -1632 320
WIRE -1456 320 -1584 320
WIRE -1088 320 -1200 320
WIRE -1024 320 -1088 320
WIRE -704 320 -1024 320
WIRE -624 320 -704 320
WIRE -576 320 -624 320
WIRE -704 336 -704 320
WIRE -1088 368 -1088 320
WIRE -576 368 -576 320
WIRE -1024 432 -1024 320
WIRE -992 432 -1024 432
WIRE -704 432 -704 400
WIRE -704 432 -768 432
WIRE -1584 464 -1584 320
WIRE -2000 480 -2000 320
WIRE -1088 496 -1088 448
WIRE -1024 496 -1088 496
WIRE -992 496 -1024 496
WIRE -576 496 -576 448
WIRE -576 496 -768 496
WIRE -192 512 -320 512
WIRE -1024 560 -1024 496
WIRE -992 560 -1024 560
WIRE -544 560 -768 560
WIRE -464 560 -480 560
WIRE -272 560 -464 560
WIRE -1840 576 -1840 368
WIRE -1088 592 -1088 496
WIRE -576 592 -576 496
WIRE -272 592 -272 560
WIRE -624 624 -624 320
WIRE -624 624 -768 624
WIRE -464 656 -464 560
WIRE -2000 704 -2000 560
WIRE -1840 704 -1840 656
WIRE -1840 704 -2000 704
WIRE -1792 704 -1792 368
WIRE -1792 704 -1840 704
WIRE -1584 704 -1584 528
WIRE -1584 704 -1792 704
WIRE -1328 704 -1328 416
WIRE -1328 704 -1584 704
WIRE -1088 704 -1088 656
WIRE -1088 704 -1328 704
WIRE -704 704 -704 432
WIRE -704 704 -1088 704
WIRE -576 704 -576 656
WIRE -576 704 -704 704
WIRE -272 720 -272 672
WIRE -2000 800 -2000 704
WIRE -464 832 -464 720
WIRE -272 832 -272 800
WIRE -272 832 -464 832
WIRE -464 864 -464 832
WIRE -320 864 -320 512
WIRE -192 864 -192 512
WIRE -192 864 -320 864
FLAG -464 864 0
FLAG -2000 800 0
SYMBOL Misc\\signal -2000 464 R0
WINDOW 0 11 104 Left 2
WINDOW 3 24 104 Invisible 2
WINDOW 123 0 0 Left 2
WINDOW 39 0 0 Left 2
SYMATTR InstName V1
SYMATTR Value SINE(0 25 60)
SYMBOL ind -288 704 R0
SYMATTR InstName K1
SYMATTR Value .1
SYMATTR SpiceLine Rser=1000
SYMBOL diode -448 720 R180
WINDOW 0 40 31 Left 2
WINDOW 3 19 1 Left 2
SYMATTR InstName DK1
SYMATTR Value 1N4148
SYMBOL Misc\\NE555 -880 528 M0
SYMATTR InstName U4
SYMBOL res -1072 352 M0
SYMATTR InstName R1
SYMATTR Value 1.1meg
SYMBOL cap -1072 592 M0
WINDOW 0 29 7 Left 2
WINDOW 3 29 60 Left 2
SYMATTR InstName C2
SYMATTR Value 7.5µ
SYMBOL cap -560 592 M0
WINDOW 0 20 9 Left 2
WINDOW 3 22 55 Left 2
SYMATTR InstName C4
SYMATTR Value 100n
SYMBOL res -592 464 M180
WINDOW 0 47 73 Left 2
WINDOW 3 35 45 Left 2
SYMATTR InstName R2
SYMATTR Value 1meg
SYMBOL cap -688 336 M0
WINDOW 0 -37 30 Left 2
WINDOW 3 -41 60 Left 2
SYMATTR InstName C3
SYMATTR Value 100n
SYMBOL diode -544 576 R270
WINDOW 0 62 31 VTop 2
WINDOW 3 64 33 VBottom 2
SYMATTR InstName D3
SYMATTR Value 1N4148
SYMBOL sw -1760 320 M270
WINDOW 0 21 15 VLeft 2
WINDOW 3 -25 16 VLeft 2
SYMATTR InstName S4
SYMBOL diode -1696 336 R270
WINDOW 0 32 32 VTop 2
WINDOW 3 -3 33 VBottom 2
SYMATTR InstName D1
SYMATTR Value MURS120
SYMBOL voltage -1840 560 R0
WINDOW 0 -38 105 Left 2
WINDOW 3 24 96 Invisible 2
WINDOW 123 0 0 Left 2
WINDOW 39 0 0 Left 2
SYMATTR InstName V2
SYMATTR Value PULSE(0 1 1 100m 100M 8)
SYMBOL polcap -1600 464 R0
WINDOW 0 -42 34 Left 2
WINDOW 3 -57 59 Left 2
SYMATTR InstName C1
SYMATTR Value 47µ
SYMBOL PowerProducts\\LT1083-12 -1328 320 R0
WINDOW 3 -119 114 Left 2
SYMATTR InstName U2
SYMBOL res -288 576 R0
SYMATTR InstName R3
SYMATTR Value 1000
TEXT -304 416 Left 2 ;KEMET
TEXT -320 448 Left 2 ;EE2-12NU
TEXT -1984 768 Left 2 !.tran 12
TEXT -1984 736 Left 2 !.model SW SW(Ron=.01 Roff=1G Vt=0.5 Vh=0)
TEXT -1992 464 Left 2 ;18VAC
TEXT -288 488 Left 2 ;C0IL
EM Fields
  • 17,377
  • 2
  • 19
  • 23
  • I will prototype it to fully test it, but this looks exactly like the simple and scalable solution that I was looking for. Thanks ! Using the 18VAC line being monitored to power the whole thing is excellent, because I do not really care about the limitation that you mentioned (timeout aborted). Unless I am missing something, like you said, this should work. – Daniel Auger Mar 08 '16 at 12:34
  • If I want to remove the final relay (where all the // 555 one-shots are going) and replace it by only **ONE** Digital Input of an Arduino, is there any additional parts to add to "protect" the Arduino ? How would you interface the // 555 one-shots to the Arduino ? – Daniel Auger Mar 08 '16 at 12:47
  • @DanielAuger: Connect all of the anodes together and then connect one end of a 2k ohm resistor to them. For 3.3V out to the Ardino, connect the free end of the resistor to the cathode of a 3.3V Zener (BZX84C3V3), ground the Zener's anode, and take the signal from the Zener's cathode as the input to the Arduino's GPIO. For a 5V output to the Arduino, do the same thing, but use a 5.1V Zener (BZX84C5.1V) instead of the 3.3V unit. – EM Fields Mar 08 '16 at 13:51
  • Thanks for the redesign. I was anyway having problems finding the MUR8120 (not available at Digikey, Mouser, Jameco), unless there was a replacement part#. I am more familiar with the new parts list. If it was to feed an Arduino, would you still suggest the same Zener approach, or would you replace the 78L12 by something else ? Or other mod ? If I go Arduino, I would also reduce the One-Shot duration to ~1 second. Thanks again. – Daniel Auger Mar 09 '16 at 13:56
  • @DanielAuger: Th relay question's been answered, so if you want to go Arduino **only** it's a different ball game and you need to post a new question. What do you **really** want to do? – EM Fields Mar 09 '16 at 14:33
  • Ok, going with the relay approach for now. If I need more sophisticated logic later, I`ll post a new question. 10-4 ! Thanks ! – Daniel Auger Mar 09 '16 at 14:44
  • I finally found time to build and test it. It works perfectly ! Thanks ! – Daniel Auger Feb 02 '17 at 04:45
  • I only found one "problem" with this design; If the ground on the relay is present, but the ground on the detection circuit is NOT present, the relay goes into "flapping" with the 18VAC input. Could a simple solution be added to the design of the detection circuit ? Thanks. – Daniel Auger Feb 09 '17 at 02:40
0

The detecting part is easy. You have 18 VAC. If the waveform is a sine, then you'll get about 25 V peak after a diode. Simply detect this DC level:

Each AC peak, C1 will charge up thru D1, which turns on the transistor. Between peaks, the voltage on C1 will decay with about a 20 ms time constant. It will take somewhere around 2½ time constants before the transistor will turn off, so 50 or 60 Hz AC input will keep the transistor on steady.

I have only shown the transistor that gets turned on and left it at a open collector that is pulled down when AC is detected. It's not clear what you want after that, so I didn't go further.

If you are looking for the first AC on, then you can tie all the collectors of the 16 detectors together. The result will be low when any AC input is present.

If you want to react to individual AC inputs, then you have to look at the 16 signals independently. It is probably easiest to wire them each into a digital input of a micro, then do the rest of the logic in firmware. If the digital inputs can be configured with passive pullups inside the micro, then you need no other parts than just a connection between each open collector and a micro input pin.

Olin Lathrop
  • 310,974
  • 36
  • 428
  • 915
  • Thanks Olin. "...If you want to react to individual AC inputs, then you have to look at the 16 signals independently...": Yes, I want to react to every "OFF->ON" AC events independently, detecting any of the 16 signals going "OFF->ON", regardless of the status of all other ones. This is not just detecting the first one going ON. – Daniel Auger Mar 06 '16 at 23:47
  • Perhaps there would be a way to bypass the firmware approach by using an approach like http://electronics.stackexchange.com/questions/210456/monostable-circuit – Daniel Auger Mar 07 '16 at 00:31
  • "...It is probably easiest to wire them each into a digital input of a micro, then do the rest of the logic in firmware...". From the detection circuit proposed above, I would know how to do the rest with an Arduino, but I was looking for something "simpler" and "lighter". If you could suggest a "micro" that you would used, that would be appreciated. Thanks. – Daniel Auger Mar 07 '16 at 02:49
  • @Dan: Any micro with at least 16 inputs and 1 output will do. That's pretty much all of them with 28 pins or more. There are ways to do this in analog by AC coupling to detect edges, then ORing the results, but that gets klunky fast with 16 channels. – Olin Lathrop Mar 07 '16 at 11:41
  • Perhaps I should not have put the number "16" in my post. When I wrote "between 1 to 16", "16" is an absolute maximum. Typically, it will be 3 to 4 sources that I will monitor. Starting with one, adding one, another one, etc... I have started to draft something by combining your circuit above with this post: http://electronics.stackexchange.com/questions/57025/0-10-second-on-time-with-a-potentiometer – Daniel Auger Mar 07 '16 at 12:46
  • It is a bit off topic, but can't resist to ask: What drawing tool do you use to make those nice and clear circuit drawings ? – Daniel Auger Mar 08 '16 at 02:03
  • @Dan: For making schematics here: 1 - Draw the schematic in Eagle. 2 - Export to image file in monochrome and 600 DPI. 3 - Shrink image down 5x in each dimension using anti-aliasing filter instead of point sampling. This also creates the result as a GIF file with 256 gray levels, which results in very good but lossless compression. 4 - Upload result into answer. Item 3 is automated in a script to not require typing all the various command line options every time. – Olin Lathrop Mar 08 '16 at 11:53
  • In your circuit, what do you suggest for D1 ? (ex: 1N4001) – Daniel Auger Mar 11 '16 at 14:22
  • @Dan: D1 will see a reverse voltage of twice the peak AC voltage, so 50 V. A 50 V diode is therefore cutting it too close. Just about any rectifier diode is fine, but it should be rated for at least a bit more than 50 V. – Olin Lathrop Mar 11 '16 at 15:11
  • Thanks for the explanation. I did not see it that way first, but it is clear now (ref: "D1 will see a reverse voltage of twice the peak AC voltage"). I will go with 1N4002 (100V). – Daniel Auger Mar 11 '16 at 18:20
  • Could you suggest a modification to your circuit to enable the use of a "shift register" technique to monitor the ACIN transitions (multiples detection circuits) (ref: youtube.com/watch?v=nXl4fb_LbcI ) – Daniel Auger Feb 13 '17 at 00:03