2

I'm planning to use Seeed's PCBA Prototype, where they request to use their open parts library(if you want them to solder the parts for you).

I came across their screw terminal block(part 3470070P1). And viewing it in Eagle, looks like this: enter image description here

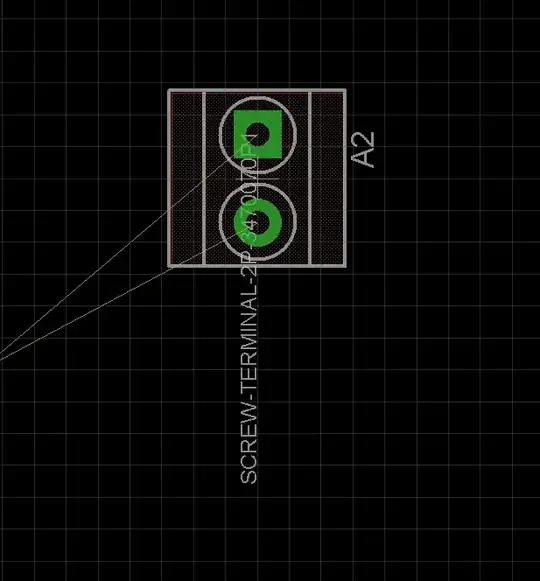
How do I know which side is the entrance for inserting the wires? I've checked the 3D model and drawing on the terminal, but it seems they didn't state which side is which?

MW_hk
  • 255
  • 1
  • 5
  • 13

2 Answers2

2

The square pad is pin 1. But when you decide to solder your component backwards it wouldn't be a problem

Handoko
  • 445
  • 2
  • 11
  • This does not help much I think, because the question indicates that the parts will not be self-soldered – Christoph May 24 '14 at 00:11
  • He didn't state that though. But when that's the case you could remove 1 route from the schematic and one of the yellow lines will disappear. That could help indicate as well. – Handoko May 24 '14 at 08:53
  • Question says "they request you to use their parts library (if you want them to solder the parts for you)" so it is reasonable to assume OP wants turnkey soldering. So if it matters to you which way that part faces, you have to know the orientation of pin 1 with respect to the part. This is a bug in the part library: a symmetric footprint for an assymetric part. – Kaz Jun 07 '14 at 15:29
  • Eagle libraries uses a squarex pad often. It usually mean pin 1 or positive. As for pin 1 on a terminal block it should be the most left pin when you're facing it from the front. – Handoko Jun 07 '14 at 16:43
0

I believe you can reasonably deduce this from the PDF together with clues from the photo in the catalog.

Note that the plastic housing of the part has tongue-and-groove moulding. This is visible also in one of the views in the PDF sheet. One side has two mouldings (tongue and groove) whereas the opposite side has only a tongue.

To me, it looks like pin 1 is on the left (which I would guess, but the photo helps confirm it). That is to say, if you hold the part so that the pins point down, and pin 1 is on the left, you should be looking into the wire guard.

If it's very important, get a clarification from Seeed.

Kaz
  • 19,838
  • 1
  • 39
  • 82